How to crochet tiny animals
Notes on learning to make amigurumi from scratch.
Amigurumi is the Japanese art of crocheting adorable small stuffed toys.
Ami = crocheted or knitted
Nuigurumi = stuffed doll (made of sewn fabric)
Amigurumi = those words merged together to mean crocheted stuffed doll
I learnt to make cute tiny animals with this technique during the first COVID lockdown, having never crocheted or knitted before. I’m still very much a beginner, but friends have asked for tips and the resources I used:
Picking a starter project
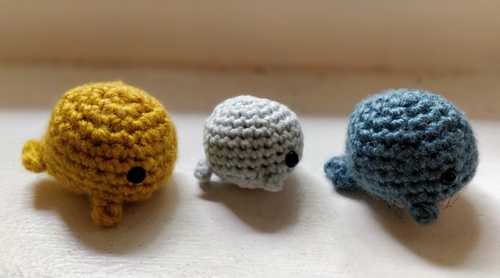
I’d suggest something simple to start with. To tell if it is simple: in general the closer it is to being a plain ball or oval shape, the easier it will be. For instance, this jellyfish or a tiny chonky round whale.
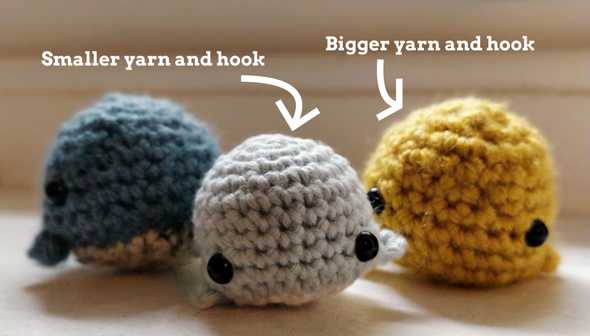
I started with this sea animals crochet kit from Beardie & Blondie on Etsy. The patterns were easy enough for a first project, but I found the yarn (Ricorumi DK cotton) and hook (3.5mm) too small having never crocheted before. 4 hours in all I had was some tangled string. I ended up getting bigger yarn (Aran) and a 5.5mm hook instead and was then able to get the hang of it as I could see what I was doing better and it was less fiddly (I like to think the previous 4 hours of pain helped too). Once I’d made my first tiny whale with the bigger materials I found I was able to use the smaller yarn and hook just fine.
You could also just get the materials (listed below) and find a crochet pattern on the internet. I’d recommend finding a beginner pattern with a YouTube video, but have also listed YouTube videos I found helpful for all the basic techniques below.
Materials
These are the materials you need to make most projects:
- Yarn (I started with acrylic Aran weight, before later being able to use the smaller cotton DK yarn - you can also scale up and use a bigger yarn and hook to make bigger versions)
- Crochet hook (I started witha 5.5mm with the heavier yarn, before later being able to use a 3.5mm or 3mm with the smaller yarn)
- A big blunt needle for sewing things together with yarn
- Something to mark your stitches (an earring or safety pin will do)
- 6mm plastic safety eyes or black thread to make eyes
- Some stuffing
You can learn anything on YouTube
I used YouTube videos to learn every technique - but quality varies. These are the ones that worked for me:
- Magic circle - most patterns start with making a tiny circle of crochet called a “magic circle” because amigurumi is generally crocheted “in the round” - which means in a spiral (instead of in straight rows), with each batch of stitches being called a round
- Increasing into the magic circle - how you make your second round of stitches after you’ve done the magic circle i.e. make the circle bigger, known as “increasing”
- Invisible decrease - how to neatly make the circle bigger, known as “decreasing
- Half double crochet stitch - often used in making tiny arms or flippers or ears
- Changing yarn colours - contains a few different ways of doing it depending on how much effort you want to put in to make it neat

